
Installation Best Practices for TFL Panels
That beautiful casework you specified will only look as good as its installation—and TFL panels are remarkably forgiving until you violate the few rules that matter.
We’ve watched stunning millwork packages arrive on site only to leave with scratched faces, chipped edges, and moisture damage that could have been prevented. The gap between a well-fabricated TFL component and a well-installed one often comes down to handling, environment, and attention to a handful of critical details.
Thermally fused laminate has earned its place as the workhorse of commercial casework for good reason. The thermal fusion process creates a durable, stable surface that resists scratches, stains, and daily abuse. But that resilience depends on proper practices throughout the supply chain—from receiving through final inspection.
In this article, you’ll learn:
- How TFL panel construction affects installation requirements
- Pre-installation protocols for receiving, storage, and acclimation
- Fabrication context that installers need to verify before field work begins
- Field installation techniques for casework, wall panels, and on-site modifications
- Critical details around edge protection, moisture management, and hardware integration
- Quality control checklists for installers and designers
- Application-specific considerations for healthcare, hospitality, and retail environments
Understanding TFL Before You Install It
How TFL Panels Are Constructed
Thermally fused laminate begins as decorative paper saturated with melamine resin. According to the Composite Panel Association, heat and pressure activate the resin in the saturated décor paper, creating a cross-linked bond with the substrate. This process fuses the decorative surfaces to the panel without a separate gluing step.
The substrate is typically particleboard, though MDF and plywood cores are available for specific applications. The Material Intelligence guide to TFL notes that particleboard and MDF are ideal substrates because they are consistent, uniform in strength, and defects-free.
This construction method matters for installation because the thermal fusion bond is integral to the panel—not an applied layer that can delaminate under stress. However, as Material Intelligence explains, substrate edges are still exposed after pressing and require edge treatments if they will remain exposed after fabrication and installation.
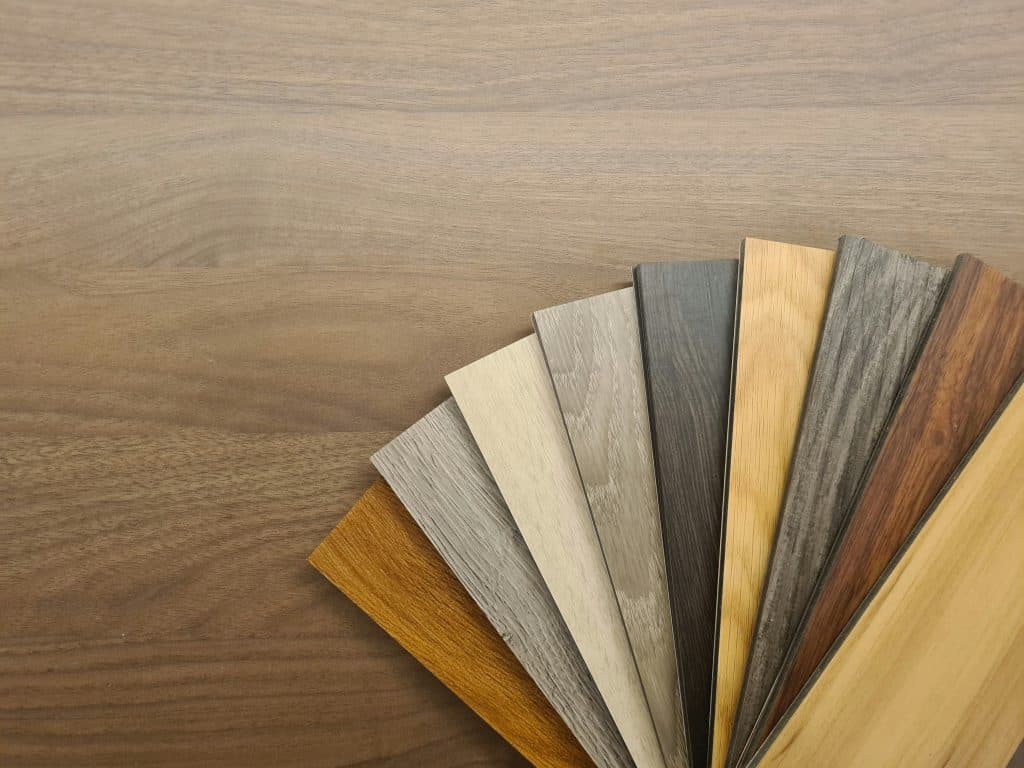
TFL Performance Characteristics Installers Must Know
TFL panels offer excellent dimensional stability under normal conditions. The melamine resin system cures clear under heat and pressure and provides high levels of scratch and wear resistance. Surface textures created by embossed steel press plates add realism to woodgrain and abstract designs without compromising durability.
That said, installers must understand the material’s limitations:
- Moisture sensitivity at edges: The decorative face resists moisture well, but exposed particleboard or MDF edges absorb water readily. Edge treatment quality determines long-term performance.
- Temperature tolerance: TFL performs best in climate-controlled environments. Extreme temperature swings can stress joints and edge treatments.
- Impact resistance: The melamine surface handles everyday wear but can chip or crack under sharp impact, particularly at edges and corners.
Common TFL Applications in Commercial Interiors
While this article anchors in casework and cabinetry—the primary TFL application—the installation principles apply across multiple uses. Wilsonart notes that TFL decorative panels work well for cabinet interiors, closet systems, open shelving, storage cubbies, fixtures, furniture, and decorative wall panels.
Healthcare, hospitality, educational, and contract furniture applications all benefit from TFL’s combination of durability, design flexibility, and cost efficiency. The key is matching installation practices to the specific demands of each environment.
Pre-Installation: Setting Up for Success
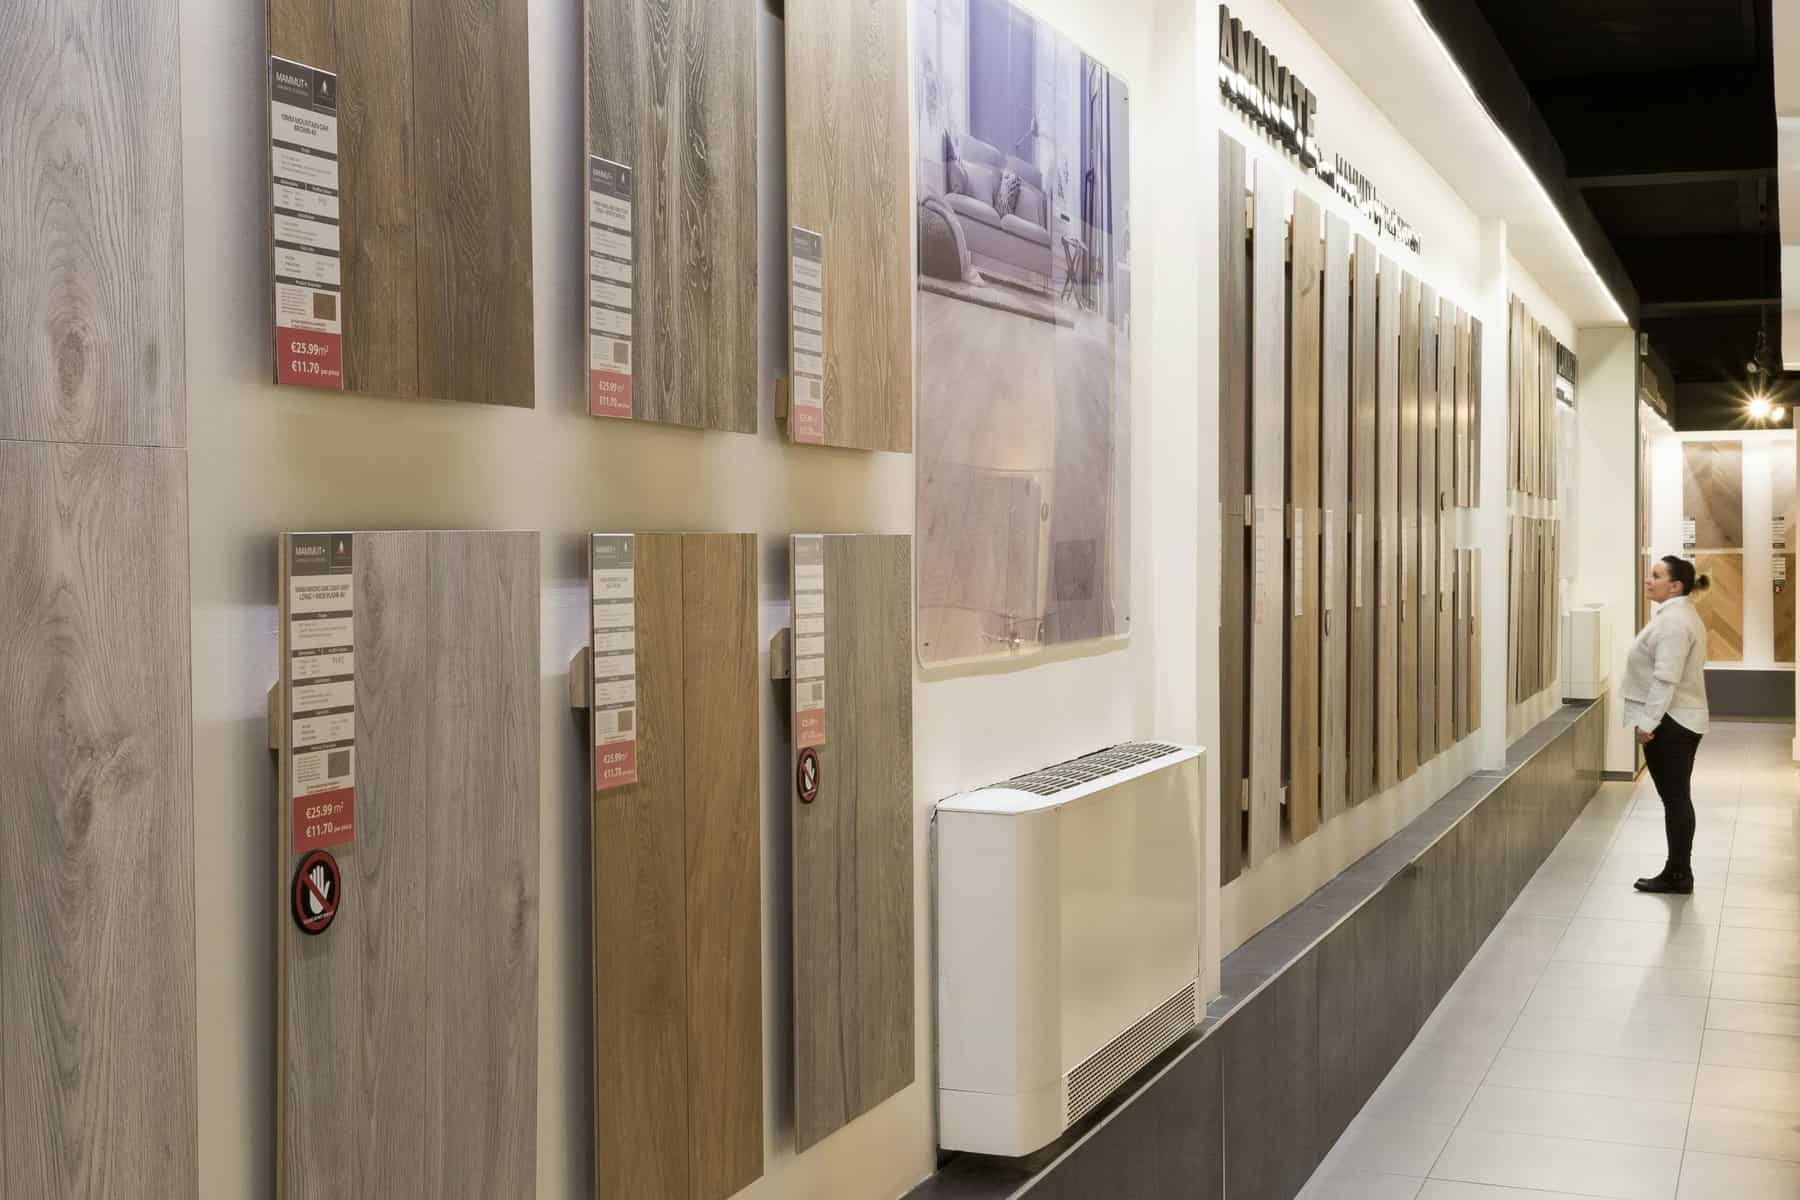
Receiving and Inspecting TFL Components
The moment casework arrives on site, the installation clock starts ticking. Proper receiving procedures prevent disputes and catch damage before it becomes your problem.
What to check at delivery:
- Count all pieces against the packing list and shop drawings
- Inspect packaging for signs of rough handling, water exposure, or crushing
- Open representative samples to verify color and finish match approved samples
- Document any visible damage with dated photographs before signing delivery receipts
- Check panel orientation markings to ensure grain direction consistency
If panels show damage, note it clearly on the delivery receipt and photograph thoroughly. A signed receipt without notation of damage transfers responsibility to you.
Storage and Acclimation Requirements
The Architectural Woodwork Institute’s Care and Storage standards establish clear parameters for woodwork storage. AWI specifies that product shall be stored prior to installation on a flat, level, clean surface, elevated off the floor and protected from sunlight, excessive heat, cold, moisture, and relative humidity variations.
Temperature and humidity parameters:
- Maintain temperatures between 60–90°F (15.5–32°C)
- Keep relative humidity between 35–65%, depending on climate zone
- Avoid storage in uncontrolled environments like open job sites or unheated warehouses
Stacking and support guidelines:
- Store panels flat, not on edge, to prevent bowing
- Support full panel faces—sagging leads to permanent warping
- Avoid stacking too high, as weight can stress lower panels
- Keep panels away from exterior walls where temperature fluctuates
Acclimation periods before installation:
AWI recommends a minimum of 72 hours for product acclimation to the installation environment. This allows panels to reach equilibrium with the space’s temperature and humidity before fastening. Rushing this step invites expansion or contraction after installation.
Substrate and Site Preparation
TFL casework installs only as well as the walls and floors allow. Before bringing panels into the space:
- Verify walls are plumb, flat, and free of significant bows
- Confirm floors are level within tolerance for casework installation
- Check that blocking and backing exist where required for secure mounting
- Ensure wet work (painting, drywall finishing, concrete curing) is complete and dry
- Verify HVAC systems are operational and maintaining stable conditions
The Leicester Flooring guide to laminate acclimation emphasizes that new construction requires stabilized HVAC systems running for at least one week before acclimation begins. Fresh concrete and new drywall release moisture that can damage laminate materials.
Fabrication Context for Installers
Edge Treatment Fundamentals
If TFL has a critical vulnerability, it’s the edge. The decorative face stops at the panel edge, leaving the substrate exposed to moisture, impact, and wear. Proper edge treatment makes or breaks long-term performance.
As the Material Intelligence edgebanding guide explains, edgebanding materials include thermoplastics like PVC, ABS, PMMA-acrylic, polypropylene, strips of HPL, melamine-saturated papers, or wood and wood veneer. Hot melt adhesives—including EVA, PUR, and polyolefin formulations—bond these materials to panel edges.
Modern edgebanders apply glue, position the edgebanding, trim flush to the panel faces, scrape excess adhesive, and buff for a finished look. Zero-glueline edge treatments use color-matched adhesives activated by heat, infrared, or lasers for seamless results.
Quality indicators installers should verify:
- Edge banding adheres firmly with no lifting or gaps
- Color and texture match the panel face
- Transitions at corners are clean and consistent
- No adhesive squeeze-out or residue remains visible
Cutting and Machining Considerations
TFL’s hard melamine surface challenges saw blades and router bits. According to Woodweb’s solutions for chipping melamine, the primary issue is chip-out—splintering of the decorative layer when cutting.
Blade requirements for clean cuts:
- Use high tooth count blades (60+ teeth for circular saws, 80+ for table saws)
- Triple-chip grind (TCG) or modified TCG tooth geometry works best for laminates
- Keep blades sharp—melamine dulls carbide faster than solid wood
- Consider scoring blades on panel saws for double-sided panels
Chip-out prevention techniques:
- Score the cut line with a utility knife before cutting
- Apply masking tape along both sides of the cut line
- Set blade height to minimize exit tear-out (just above the panel surface)
- For critical cuts, make a shallow scoring pass first, then full-depth cut
- Support panels fully to prevent vibration during cutting
What Installers Should Verify from the Shop
Before beginning field installation, confirm the fabricated components meet specifications:
- Edge-banding adhesion: Press firmly along all edges checking for lift or gaps
- Cut quality: Inspect edges for chip-out, burn marks, or rough surfaces
- Dimensional accuracy: Spot-check critical measurements against shop drawings
- Hardware prep: Verify pilot holes, hinge cups, and mounting holes are correct
- Panel identification: Confirm orientation markings match installation sequence
Catching fabrication issues before installation saves costly field rework.
Field Installation Techniques
Handling Panels on Site
Even well-fabricated TFL components can suffer damage during the last fifty feet to their final position. The Material Intelligence TFL guide notes that TFL’s decorative faces are durable paper-based surfaces—but they’re not indestructible.
Preventing damage during transport and positioning:
- Carry panels vertically by long edges, never dragging across surfaces
- Use moving blankets or cardboard to protect faces during transport
- Avoid leaning panels against walls at steep angles—they can slip and chip
- Clear pathways of debris before moving large components
- Use proper lifting equipment for heavy assemblies
Protecting finished surfaces during installation:
- Leave protective film in place until final installation stages
- Keep work surfaces clean—grit under panels scratches faces
- Avoid setting tools, fasteners, or hardware directly on finished surfaces
- Install temporary protection on installed casework before adjacent trades work nearby
Fastening Methods for Casework
TFL panels on particleboard or MDF cores require fasteners designed for engineered materials. Standard wood screws often fail to grip reliably.
Confirmat screws were developed specifically for edge-to-face joining of particle-based products. According to McFeely’s fastener guide, they feature deep threads on an oversized shank, a clearance-hole diameter shoulder beneath the head, and require a special three-step drill bit. The result is a tight, strong joint that can be disassembled and reassembled without losing strength.
Cam lock and dowel assembly systems combine alignment dowels with mechanical fasteners for ready-to-assemble construction. These require precise boring but create strong, adjustable connections.
Bracket and cleat mounting work well for securing casework to walls. Use backing or blocking at attachment points, and avoid relying solely on drywall anchors for heavy loads.
Adhesive applications: While TFL faces don’t bond well with most adhesives due to the melamine surface, construction adhesive can supplement mechanical fasteners at backs and concealed surfaces. Adhesive alone is not sufficient for structural connections.

Wall Panel Installation
When TFL extends to wall applications, additional considerations apply:
- Furring and substrate attachment: Mount to solid blocking or furring strips secured to structure—not directly to drywall
- Panel alignment and reveal management: Use spacers for consistent gaps; TFL doesn’t forgive visible variation
- Expansion allowance: Leave small gaps at panel perimeters to accommodate movement
- Seam and joint treatment: Align grain direction across adjacent panels; consider transition strips for prominent seams
Adjustments and Fitting in the Field
Sometimes field modification is unavoidable. When it is:
- Use the same cutting techniques that prevent chip-out in the shop
- Apply matching edge treatment to any field-cut edges
- For scribe cuts against irregular surfaces, transfer the profile accurately before cutting
- Avoid power tools directly against finished adjacent surfaces
Field cuts should be the exception, not the rule. Accurate site dimensions before fabrication minimize the need for on-site modification.
Critical Details That Make or Break Installations
Edge Protection Strategies
Edges take abuse. Countertop front edges, door edges, and exposed panel ends experience daily contact that tests edge treatment durability.
Vulnerable locations requiring extra attention:
- Countertop waterfall edges at corners
- Cabinet door edges (especially at pulls)
- Desk front edges at knee contact points
- Panel ends in high-traffic corridors
Reinforcement options for high-wear edges:
- Specify 3mm PVC or ABS edge banding instead of thinner options
- Consider solid surface or metal edge treatments for extreme-use locations
- When impact resistance is critical, HPL may be a better choice than TFL for that component
Moisture Management
TFL faces handle moisture well, but the substrate does not. Careful detailing prevents water damage.
Sink cutout and plumbing penetration protocols:
- Seal all cutout edges before sink installation
- Apply silicone or appropriate sealant at countertop-to-backsplash intersections
- Ensure plumbing penetrations don’t leave exposed particleboard
- Verify undersink areas have adequate ventilation to prevent condensation
Backsplash and countertop intersections:
- Caulk joints with appropriate color-matched sealant
- Ensure backsplash material extends to countertop surface without gaps
- Slope countertops away from walls where possible
Hardware Integration
Modern hardware requires precise installation to function properly with TFL panels.
Hinge mounting and adjustment:
- Use hinge cups designed for TFL/particleboard substrates
- Follow manufacturer boring specifications exactly
- Adjust hinges for proper door alignment after mounting
Drawer slide installation:
- Verify slide selection matches load requirements
- Mount slides level and parallel—TFL doesn’t flex to compensate for misalignment
- Use appropriate screws for particleboard (coarse thread, proper length)
Soft-close mechanisms:
- Test soft-close function before final adjustment
- Confirm mechanisms don’t interfere with interior components
Alignment and Reveals
Inconsistent gaps and misaligned faces stand out on TFL’s uniform surfaces.
- Maintain consistent reveals (gaps) between doors and drawer fronts
- Use adjustment mechanisms in hinges and slides to achieve alignment
- For frameless construction, alignment is even more critical—there’s no face frame to hide variation
- Check alignment under the same lighting conditions the space will have in use

Quality Control and Inspection
Installer Self-Inspection Checklist
Before calling installation complete:
- All components installed per shop drawings
- Doors and drawers operate smoothly without binding
- Hardware functions correctly (soft-close, catches, pulls)
- No visible damage to faces or edges
- Alignment consistent across all components
- Reveals uniform within tolerance
- Protective film removed; surfaces clean
- Touch-up completed on any minor damage
- Installation area cleaned of debris and packaging
Designer/Specifier Inspection Points
When reviewing installed TFL casework:
- Compare installed work to approved shop drawings and samples
- Check grain direction consistency where specified
- Verify hardware matches specifications
- Inspect under typical lighting conditions
- Test drawer and door operation
- Examine edges at eye level and below for damage
- Document any issues with photographs for punch list
According to AWI QCP guidance, inspection ensures that shop drawings match the end result and that wood casework meets AWI standards. A project is only as good as its execution.
Addressing Installation Defects
Not every issue requires replacement:
- Minor chips: Touch-up products designed for melamine can repair small damage
- Edge banding lifting: Re-adhesion with heat and pressure may salvage the component
- Surface scratches: Deep scratches cannot be repaired; replacement is required
- Alignment issues: Many can be corrected through hardware adjustment
Document defects thoroughly and establish clear acceptance criteria before beginning remediation.
Application-Specific Considerations
Healthcare and Cleanroom Environments
Healthcare installations demand extra attention to cleanability and infection control:
- Specify antimicrobial surface options where available
- Ensure edge treatments are seamless to prevent bacterial harboring
- Coordinate chemical resistance requirements with cleaning protocols
- Minimize seams and joints where contaminants can collect
Hospitality and High-Traffic Commercial
Heavy use requires robust installation:
- Specify higher-duty drawer slides for guest room casework
- Use concealed fastening systems that resist tampering
- Plan for maintenance access when components will need service
- Coordinate with FF&E installation sequences
Retail and Display Applications
Retail environments often require flexibility:
- Consider demountable systems for frequently reconfigured fixtures
- Plan wire management for integrated lighting and power
- Coordinate with signage and graphics installation
- Specify appropriate load ratings for merchandise displays
Troubleshooting Common Installation Problems
Edge-banding failures: Usually result from poor adhesion during fabrication, impact damage during handling, or moisture exposure. Prevention is easier than repair—protect edges during transport and installation.
Chip-out and surface damage: Typically occurs during handling or from tools and materials placed on finished surfaces. Maintain clean work areas and use protective coverings.
Alignment and fit issues: Often trace back to inaccurate field measurements or site conditions that changed after measurement. Re-measure critical dimensions before fabrication.
Moisture-related problems: Swelling at edges, lifting edge bands, and substrate deterioration indicate water exposure. Ensure spaces are climate-controlled before installation and maintain proper humidity after.
Hardware malfunction: Usually related to incorrect boring, inadequate fastening, or misalignment. Verify hardware specifications match panel thickness and substrate type.
Case Studies: TFL Installation Excellence
Healthcare Casework: Zero Punch List Items
A regional medical center specified TFL casework for 200 patient rooms. The installation team implemented a receiving protocol requiring photographic documentation of every component. They acclimated panels for a full week in climate-controlled staging areas before installation began. The result: zero punch list items related to casework damage, and the project completed ahead of schedule.
Retail Fixture Program: Field Modification Protocol
A national retailer needed store fixtures that could adapt to varying floor plans. The design team specified slightly oversized panels with predetermined scribe allowances. Field installers followed a documented cutting protocol with appropriate blade selection and edge treatment for field cuts. The standardized process reduced installation time by 20% while maintaining finish quality.
Hospitality Millwork: Site Damage Recovery
A boutique hotel project suffered water damage to stored casework when a pipe burst overnight. The installation team immediately isolated affected components, documented damage, and worked with the fabricator to identify which pieces could be salvaged versus replaced. Quick action saved 60% of the affected components and kept the project on schedule.

FAQs – TFL Panel Installation
How long should TFL panels acclimate before installation?
AWI recommends a minimum of 72 hours in the installation environment. In extreme temperature or humidity differentials—such as moving panels from an unheated warehouse into a climate-controlled space—extend acclimation to 96 hours or more.
What causes TFL edge banding to fail after installation?
Edge banding failures typically result from moisture exposure, impact damage, or poor initial adhesion. Prevent failures by protecting edges during handling, maintaining proper humidity levels, and verifying adhesion quality before installation.
Can TFL panels be cut in the field without chipping?
Yes, with proper technique. Use high-tooth-count blades designed for laminates, apply masking tape along cut lines, make a shallow scoring pass before the final cut, and support panels fully to prevent vibration.
What fasteners work best for TFL casework on particleboard?
Confirmat screws offer excellent holding power for edge-to-face joints. Cam lock systems work well for RTA applications. Coarse-thread screws outperform fine-thread wood screws in particleboard substrates. Always pre-drill pilot holes.
How do I repair minor chips in TFL surfaces?
Small chips can be addressed with melamine touch-up products that match the surface color. For larger damage or chips at highly visible locations, replacement is typically the better option.
Conclusion: Quality Lives in the Details
TFL installation success comes down to respecting the material’s characteristics and following proven practices at every stage. Proper receiving and acclimation, careful handling, appropriate fastening, attention to edge protection, and thorough quality control separate installations that perform for decades from those that generate warranty claims.
Whether you’re an installer refining your process or a designer learning what to specify and inspect, the principles remain consistent: protect the edges, control the environment, verify before you fasten, and document everything.
For TFL panel resources, technical guidance, and access to over 800 colors and finishes, visit KML Designer Finishes. Our spec reps can help you select the right TFL panels for your application and connect you with fabricators who understand installation best practices.