
Material Selection: Budget-Smart Strategies for Commercial Projects
The cheapest material on your spec sheet might be the most expensive decision you make—and the most expensive material might actually save your client money. We’ve watched this paradox play out across hundreds of commercial interior projects, and the pattern is always the same: firms that focus only on first costs end up paying more. Firms that think in terms of total value deliver better results for less.
Budget-smart design isn’t about cutting corners. It’s about understanding where every dollar creates the most impact—and where it disappears into maintenance, replacement, and regret.
In this article, you’ll learn:
- Why first costs mislead and how to calculate total cost of ownership
- How value engineering works as a proactive design tool, not a last-minute budget cut
- Strategic material selection approaches for flooring, walls, casework, and ceilings
- Specification strategies that protect both budget and design intent
- How to have better conversations with clients about money

The True Cost of Materials: Beyond the Price Tag
When we talk about material costs, most people think about the number on the invoice. But that number represents only the beginning of the story. The full story includes installation labor, ongoing maintenance, eventual replacement, and sometimes—when things go wrong—unexpected remediation.
First Cost vs. Lifecycle Cost: When Each Matters
First cost is the upfront price of purchasing and installing a material. Lifecycle cost is everything that material costs over its useful life: purchase, installation, maintenance, repairs, and replacement.
Here’s where it gets interesting: the relationship between first cost and lifecycle cost isn’t linear. A flooring material that costs twice as much upfront might cost half as much over 20 years. Or a material that looks like a bargain might require so much maintenance that it becomes the most expensive option in the building.
Lifecycle cost analysis research found dramatic differences across common flooring materials. Quarry tile had the lowest life cycle cost at $0.95 per square foot cost per year, while sheet vinyl proved the most expensive at $2.26 per square foot cost per year over the life of a building. That’s more than a 2x difference in annual cost between materials that might look similar on a bid sheet.
When does first cost matter most? When the client won’t own the space long enough to realize lifecycle savings. When cash flow constraints make upfront investment impossible. When the space will be reconfigured before materials reach end of life.
When does lifecycle cost matter most? When the client plans to occupy the space for 10+ years. When maintenance burden affects operational efficiency. When sustainability certifications require lifecycle thinking.
The designer’s job is to understand which scenario applies—and to communicate the tradeoffs clearly.
The Hidden Costs That Blow Budgets
Material costs don’t exist in isolation. Every material choice triggers secondary costs that often exceed the material itself.
Installation complexity varies dramatically across materials. A porcelain tile with precise rectified edges requires skilled labor and takes longer to install than standard ceramic. That labor premium might add 30% to your installed cost. Meanwhile, a pre-finished flooring system might install in half the time, offsetting its higher material cost.
Maintenance requirements compound over years. Vinyl composition tile (VCT) has a low first cost, but it requires regular waxing and stripping. Although VCT has a low initial cost, it requires frequent waxing and stripping. A building owner with 60 locations running VCT across their portfolio pays those maintenance costs thousands of times over.
Replacement frequency multiplies everything. A carpet tile rated for 10 years in heavy commercial traffic costs half as much per square foot as one rated for 15 years. But over 30 years, you’ll replace the cheaper option three times versus twice for the better product—and each replacement includes demolition, disposal, and business disruption.
Coordination costs hide in the details. A wall finish that requires special substrate preparation adds cost to your drywall contractor’s scope. A ceiling system that doesn’t integrate with your lighting plan creates field modifications. These coordination costs rarely appear in material budgets, but they hit the project hard.
Calculating Total Cost of Ownership for Clients
We’ve developed a simple framework for presenting lifecycle costs to clients. It works because it’s visual and it’s honest about assumptions.
Start with a 15-year window—long enough to capture meaningful lifecycle differences, short enough to feel relevant. Create three columns: first cost, annual maintenance, and replacement events. Sum everything to get total cost of ownership (TCO).
Then calculate cost per year. This number is the great equalizer. It lets clients compare a $12 per square foot flooring with 25-year life against an $8 per square foot flooring with 10-year life. The math often surprises people.
The key is transparency about assumptions. What maintenance protocols are you assuming? What replacement timeline? What labor rates? Document everything. Clients respect honesty about uncertainty far more than false precision.
When Premium Materials Actually Cost Less
Sometimes the expensive option is the cheap option. We’ve seen this pattern repeatedly in commercial interiors.
High-traffic corridors specified with premium LVT instead of standard VCT saved one healthcare client $340,000 in maintenance costs over 10 years across their facility portfolio. The LVT cost 40% more upfront. It cost 60% less in total.
Acoustic ceiling panels with enhanced durability in a call center environment lasted twice as long as standard panels, even though the aggressive HVAC cycling and 24/7 operation created harsh conditions. The premium panels cost 25% more. They saved 50% over the lifecycle.
The lesson isn’t that premium always wins. The lesson is that matching material performance to actual use conditions determines value—not price tags.

Value Engineering as a Design Tool, Not a Budget Cut
Value engineering has a reputation problem. Too often, it’s code for “we came in over budget, now we need to cut things.” That’s not value engineering. That’s panic.
What Value Engineering Actually Means
Value engineering originated at General Electric during World War II. General contractors originally adopted this practice during World War II as a manufacturing cost-saving strategy. Engineers facing material shortages had to find alternatives that maintained function at lower cost. The discipline that emerged focused on function analysis: understanding what each element actually needs to do, then finding the most efficient way to accomplish it.
True value engineering asks: “Are we achieving required functions through the most cost-effective means?” This is fundamentally different from asking: “What can we cut?”
Value engineering in construction gets misunderstood as simple cost-cutting—slashing budgets by eliminating features or downgrading materials. This misconception causes developers to resist VE, fearing quality compromises that damage long-term asset value.
The distinction matters because cost-cutting often destroys value while VE creates it. Cutting a lobby feature to save $15,000 might reduce building lease rates by $2 per square foot—costing far more than it saves. Value engineering that lobby might find a different material approach that achieves the same impact for $10,000 less.
Proactive vs. Reactive Value Engineering
Timing determines whether value engineering creates opportunity or damage.
Proactive VE happens during schematic design and design development. Options are still open. Changes are cheap. The design team can explore alternatives without compromising the project’s core intentions.
Reactive VE happens after bids come in high. Options are limited. Changes require redesign fees. The design team is defensive rather than creative. Contractors smell blood and push for substitutions that benefit their margins.
VE catches materials or systems that add cost but offer little benefit. But this catching only works when there’s time to act thoughtfully.
We build VE checkpoints into our project schedules at 50% SD, 100% SD, and 50% DD. Each checkpoint includes a cost estimate and a formal review of material choices against function requirements. By the time we reach construction documents, we’ve already optimized.
The 80/20 Rule for Material Impact
Not all materials matter equally. Some carry the design; others just fill space.
In most commercial interiors, roughly 20% of material selections drive 80% of visual and experiential impact. These are your “hero materials”—the ones that define the space. Protect these fiercely.
The other 80% of selections support the heroes without demanding attention. These supporting materials are where smart value engineering happens. Nobody notices the difference between a $4 ceiling tile and a $6 ceiling tile in a back-of-house corridor. But they absolutely notice if you downgrade the feature wall in the lobby.
Map your materials into these categories early. Then apply budget pressure strategically. Invest in heroes. Economize on support materials. Protect function everywhere.
Where to Invest and Where to Economize
Through dozens of projects, we’ve identified consistent patterns for where investment pays off and where economy makes sense.
Invest heavily in:
- Entry sequences and first impressions—these set expectations
- High-touch surfaces that people contact daily
- Materials visible from primary circulation paths
- Anything that affects acoustics in focus work areas
- Flooring in high-traffic zones where lifecycle matters most
Economize strategically on:
- Back-of-house and service areas with limited visibility
- Upper walls and ceilings where distance reduces detail perception
- Secondary circulation paths and utility corridors
- Materials that will be covered by furniture or equipment
- Anything slated for replacement within five years due to tenant changes
This isn’t about hiding cheap materials. It’s about allocating budget where it creates the most value for occupants.
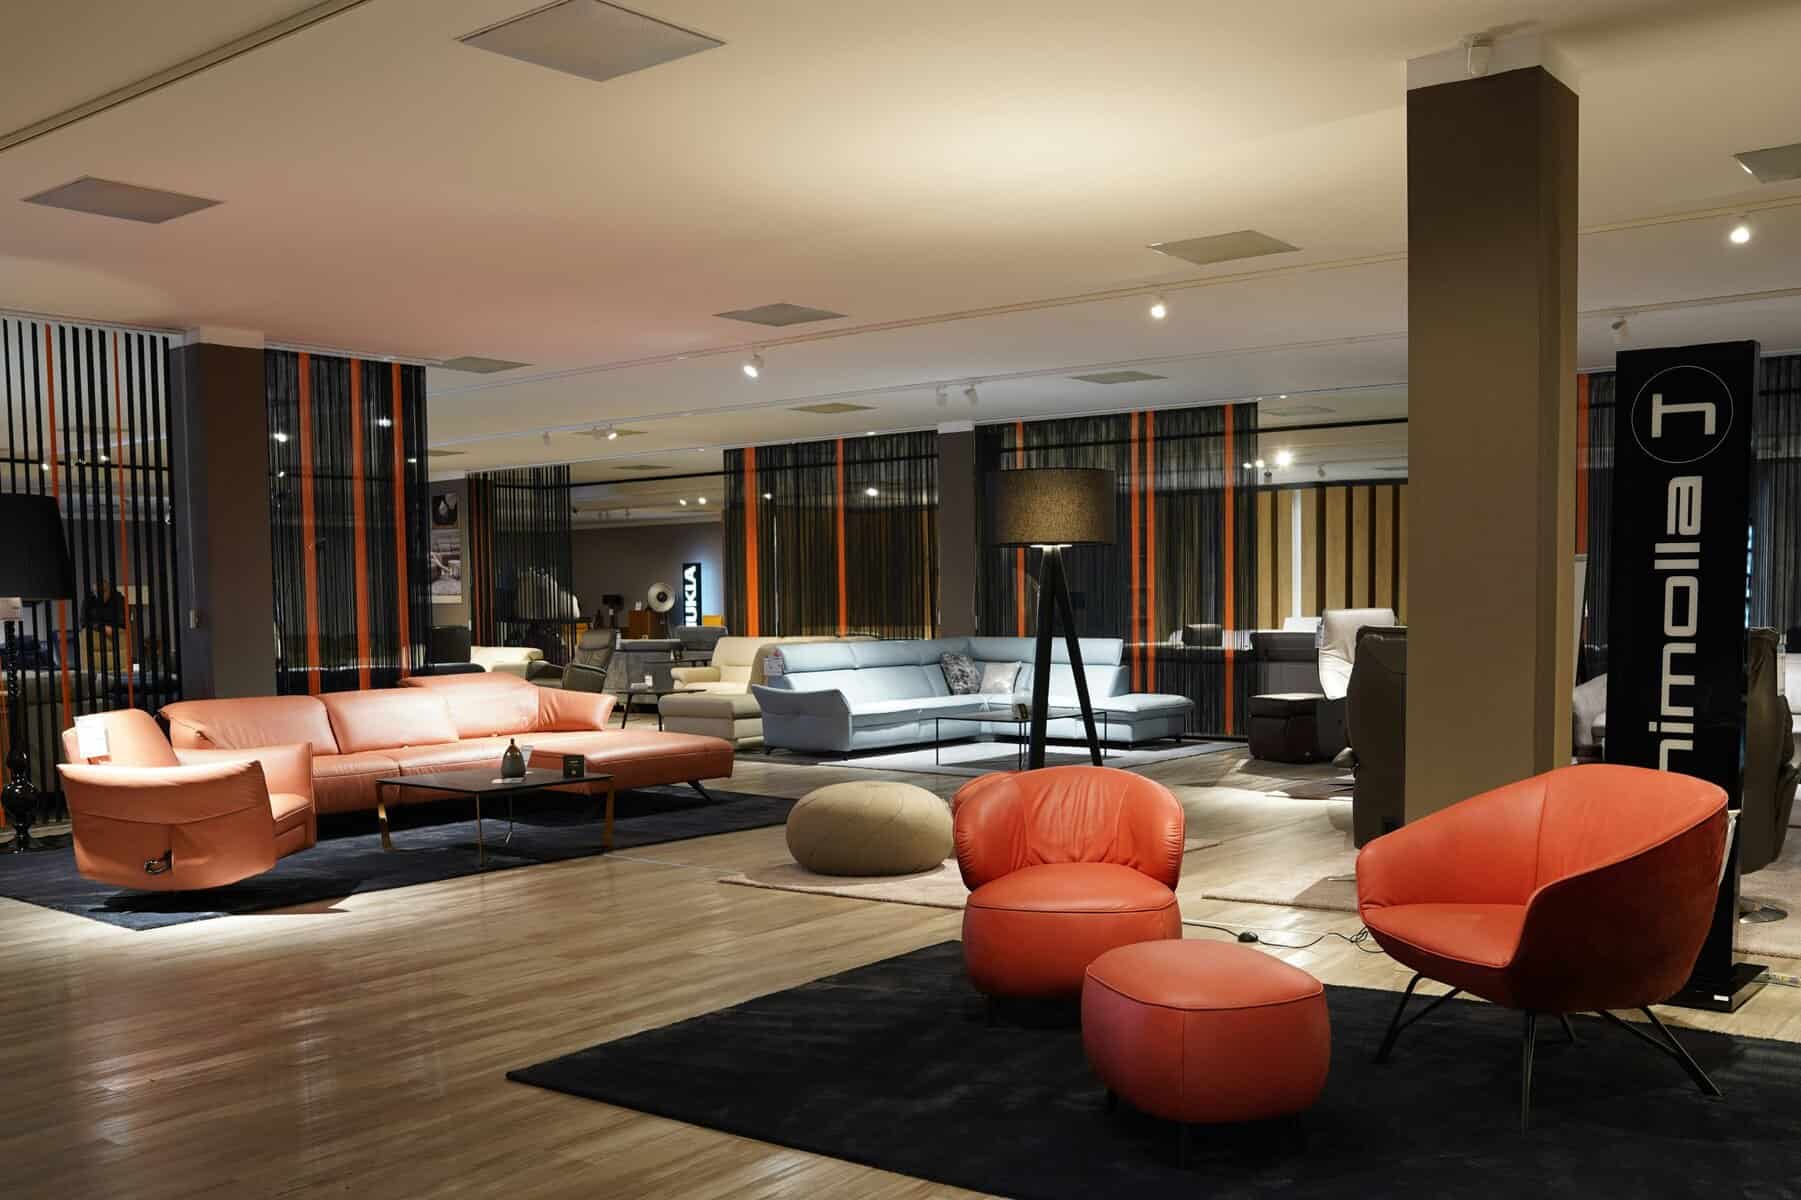
![]()
Strategic Material Selection by Category
Each material category presents different opportunities for budget-smart specification. Here’s how we approach the major categories in commercial interiors.
Flooring: Balancing Durability, Aesthetics, and Cost
Flooring typically represents 15-25% of interior finish budgets and has the most dramatic lifecycle cost variation of any category.
The key insight: flooring performance requirements vary dramatically across zones. A main lobby needs different performance than a private office needs different performance than a storage room. Specifying the same material everywhere wastes money in low-traffic areas and may underperform in high-traffic areas.
We zone flooring by traffic intensity and visibility, then match materials to zone requirements:
- High traffic / high visibility: Premium LVT, porcelain tile, or terrazzo—materials that justify investment through performance and impact
- High traffic / low visibility: Durable but economical options like rubber or standard commercial tile
- Low traffic / high visibility: Opportunity for design expression at moderate durability requirements
- Low traffic / low visibility: Basic performance at lowest cost
Value engineering is the coordinated and purposeful method of identifying the best-value solutions to fit your budget, design and aesthetics. Much of that is determined through life cycle cost analysis—the practice of examining the cost of material over its usable life as opposed to solely the upfront cost.
Wall Surfaces: High-Impact, Lower-Cost Alternatives
Walls offer significant value engineering opportunity because they’re typically low-touch surfaces where ultra-high durability isn’t required.
Paint remains the most cost-effective wall finish, but the type of paint matters. A premium paint with better coverage and washability might cost 30% more per gallon but require fewer coats and last longer between repainting cycles.
Accent walls create focal points without treating entire rooms. A single feature wall in high-performance material (textured laminate, wood slat system, dimensional tile) surrounded by painted surfaces costs far less than four walls of premium finish—while often creating more design impact.
Millwork returns deliver visual richness through three-dimensional reveals rather than expensive materials. A simple paint-grade wood return detail can transform a standard corridor at a fraction of the cost of full wall treatments.
Casework and Millwork: The TFL Advantage
Casework represents one of the biggest opportunities for budget-smart specification, and the secret is understanding the material hierarchy.
Wood veneer casework looks beautiful but costs significantly more than alternatives. High-pressure laminate (HPL) offers excellent durability but adds labor costs for field application. Thermally fused laminate (TFL) provides the sweet spot for many commercial applications.
Research from value engineering studies shows dramatic cost differences. Compared to only HPL or wood veneers, the cost savings for TFL were substantial, both for materials and labor. The total project cost was approximately 36% higher for HPL and 79% higher for wood veneers.
That’s not a marginal difference. A project that saves 36% on casework costs by specifying TFL instead of HPL frees substantial budget for other priorities—or delivers meaningful savings to the client.
Modern TFL products from manufacturers like KML Designer Finishes offer design flexibility that rivals HPL, with textures and patterns that read as authentic wood or stone. The key is understanding where TFL excels (vertical surfaces, cabinet interiors, low-impact horizontal surfaces) versus where HPL’s superior impact resistance justifies its premium (high-wear countertops, heavy-use work surfaces).
TFL’s decorative faces are thermally fused to the panel core; they are not glued on. TFL’s wear and scratch resistance is comparable to that of HPL. This thermal fusion creates a durable bond that won’t delaminate, making TFL appropriate for demanding commercial applications.
The design matching programs now available from TFL manufacturers mean you can specify TFL for casework, HPL for counters, and matching edge banding—creating visual consistency while optimizing cost for each application.
Ceiling Systems: Performance Meets Budget
Ceilings often get specified as an afterthought, but smart ceiling selection balances acoustics, aesthetics, and budget.
Standard acoustic ceiling tile (ACT) in a 2x4 grid remains the most economical solution for offices, healthcare, and education. The material has improved dramatically—today’s premium ACT looks nothing like the dated systems of decades past.
Where ACT won’t work aesthetically, consider hybrid approaches. An ACT field with accent elements (wood slats, metal panels, clouds) at key locations costs far less than full specialty ceilings while achieving similar visual impact.
For open ceilings exposing structure, remember that “exposed” isn’t free. Paint, acoustic spray, and cable management all add cost. Sometimes the most budget-smart ceiling is a well-designed suspended system rather than a trendy exposed look that requires extensive above-ceiling coordination.
Furniture and FF&E: Specifying for Value
Furniture represents the largest discretionary spend in most commercial interiors, and it’s where budget-smart thinking pays the biggest dividends.
The key insight: furniture has dramatic price variation for similar function. A task chair meeting basic ergonomic requirements might cost $300 from one manufacturer and $1,200 from another. Both accomplish the same function. The difference is brand positioning, material quality, and warranty.
For most commercial applications, we recommend a tiered approach:
- Executive and client-facing areas: Premium furniture that represents the brand
- Primary workstations: Solid mid-market options with good warranties
- Support spaces: Budget-friendly options that meet function requirements
- Temporary or flex spaces: Consider lease versus purchase
Also consider the used and refurbished market. Commercial furniture has long lifecycles, and quality manufacturers’ products retain function even after years of use. A refurbished Herman Miller chair might cost 40% of new while delivering 90% of the performance.
Specification Strategies That Protect Budget and Design Intent
How you write specifications affects what you get—and what you pay. Strategic specification language creates flexibility without sacrificing control.
Performance-Based vs. Proprietary Specifications
Proprietary specifications name specific products. Performance-based specifications describe required characteristics. Each approach has budget implications.
Proprietary specs guarantee exactly what you want but eliminate competitive pricing. If you name one manufacturer, that manufacturer sets the price.
Performance specs create competition. Multiple products might meet your requirements, and contractors will price the most economical option. This typically reduces costs—but requires careful criteria definition to ensure acceptable quality.
For most commercial interior applications, we recommend performance-based specifications with “basis of design” products. This approach identifies a specific product that meets your requirements, then allows substitutions that meet equivalent performance criteria. You get competition without sacrificing quality benchmarks.
Tiered Alternates: Good, Better, Best
Budget uncertainty is real. Bids come in high. Client priorities shift. Having pre-approved alternates ready protects both budget and design integrity.
We develop specifications with three tiers:
- Base specification: The primary material meeting all performance requirements
- Value alternate: A lower-cost option that meets minimum acceptable performance
- Premium alternate: An upgraded option if budget allows
Document the differences clearly. What performance criteria change between tiers? What visual characteristics differ? What lifecycle implications exist?
When bids come in, you can adjust to budget reality without reactive scrambling. The value alternate isn’t a “cut”—it’s a pre-approved option that still meets design intent.
Allowances and Contingencies Done Right
Allowances acknowledge uncertainty. Contingencies provide cushion. Both require disciplined management to protect budgets.
Material allowances should include specific scope definitions. “Flooring allowance: $6.00 per square foot installed” is clearer than “flooring allowance: $50,000.” The per-unit allowance lets you adjust scope and budget together as selections finalize.
Contingencies should match project risk. New construction with clear scope: 5-7% contingency. Renovation with unknown conditions: 10-15%. Historic renovation with regulatory uncertainty: 15-20%.
The mistake we see repeatedly: using contingency as hidden budget. That’s not contingency—it’s wishful thinking. True contingency sits untouched until legitimate unforeseen conditions arise.
Substitution Language That Works for Everyone
Clear substitution language prevents disputes and protects value. Vague language invites contractors to propose inferior products.
Effective substitution clauses include:
- Specific performance criteria that must be met or exceeded
- Aesthetic criteria including color range, texture, and finish
- Warranty requirements that match or exceed basis of design
- Submission deadlines (typically within 30 days of notice to proceed)
- Clear identification of who approves substitutions
- Documentation requirements at proposer’s expense
The goal isn’t to prevent all substitutions. Sometimes contractors find genuinely equivalent products at better prices—that’s value. The goal is ensuring substitutions maintain design intent while creating fair comparison frameworks.
Client Conversations About Budget
Money conversations are relationship conversations. How you discuss budget affects client trust, project outcomes, and your firm’s reputation.
Reframing Cost as Investment
The word “cost” implies expense—money leaving. The word “investment” implies return—money working. This reframing isn’t spin. It’s accuracy.
When clients view interior finishes as costs, they optimize for minimum expenditure. When they view finishes as investments, they optimize for maximum return. The returns are real: employee productivity, talent attraction, brand perception, lease rates, reduced maintenance.
We present material recommendations in investment terms. “This flooring investment reduces annual maintenance costs by $3.20 per square foot” is more compelling than “This flooring costs $4 more per square foot.”
Quantify returns wherever possible. Research supports connections between interior environment and outcomes. Office design affects productivity. Healthcare environments affect healing. Retail environments affect purchase behavior. Connect material choices to measurable business results.
Presenting Options Without Undermining Expertise
Clients want choices. They also want guidance. The challenge is providing options without creating decision paralysis or undermining your professional judgment.
We typically present three options per major decision, clearly ranked:
- Recommended: Our professional recommendation with rationale
- Alternative A: A legitimate option for different priorities
- Alternative B: Another legitimate option for different priorities
This structure acknowledges client agency while making our expertise visible. Clients who want to defer to professional judgment choose “recommended.” Clients with specific constraints or preferences can explore alternatives confidently.
What doesn’t work: presenting ten equivalent options and asking “which do you like?” That abdicates professional responsibility and burdens clients with decisions they hired you to make.
When to Push Back on Unrealistic Budgets
Sometimes clients have budgets that can’t deliver their stated goals. Accepting these projects without honest conversation sets everyone up for failure.
Early budget discussions should include benchmark data. “Based on projects of similar scope and quality level, we typically see construction costs of X to Y per square foot. Your stated budget implies Z per square foot. Let’s discuss how to align expectations.”
If alignment isn’t possible, document the gap clearly. “We understand budget constraints require value engineering. At this budget level, we recommend focusing investment on [specific areas] while economizing on [specific areas]. This approach prioritizes [stated client values].”
Never promise what you can’t deliver. A project that blows its budget damages everyone—the client, the contractor, and your firm’s reputation. Honest early conversations prevent painful late surprises.
Documenting Decisions to Protect Everyone
Budget decisions should be documented in writing. This protects clients from misunderstanding, protects you from scope creep, and provides clear records if disputes arise.
Every significant value engineering decision should include:
- Description of the change
- Cost implication (savings or addition)
- Performance implication (if any)
- Client approval signature and date
This documentation becomes invaluable when clients later ask “why did we choose this material?” or when contractors propose changes. The record shows what was decided, why, and by whom.

Value Engineering Case Studies
Theory becomes real through examples. Here are three situations where strategic material selection delivered meaningful value.
Case Study 1: The Lobby Redesign That Saved $80K Without Sacrificing Impact
A corporate client wanted a dramatic lobby renovation. Initial designs specified imported stone flooring, custom millwork, and feature lighting totaling $380,000.
Budget review revealed constraints. We needed to deliver similar impact at $300,000 or less.
Our approach: analyze which elements created the most impact. The feature wall behind reception drove the space. The flooring provided backdrop. The lighting connected everything.
We maintained the feature wall specification—that was the hero. For flooring, we specified a domestic porcelain tile that achieved similar visual effect to imported stone at 40% less cost. For millwork, we switched from wood veneer to TFL with matched finishes, saving 35% while maintaining design intent. The lighting specification stayed.
Final budget: $295,000. Client feedback: “It looks exactly like what we envisioned.” The savings came from strategic substitution, not compromise.
Case Study 2: How TFL Casework Cut Millwork Costs by 35%
A hospitality client needed casework for 65 hotel rooms plus common areas. Original specification called for HPL on all surfaces—a durable but expensive approach.
We proposed a hybrid specification: HPL on high-wear horizontal surfaces (desk tops, counter tops, shelf surfaces) and TFL on vertical surfaces (cabinet fronts, side panels, back panels). Matching décor papers meant visual consistency across both materials.
The material cost savings were significant—TFL typically runs 25-40% less than HPL for vertical applications. Labor savings added more: TFL panels come pre-finished, eliminating field lamination time.
Total millwork savings: 35% versus all-HPL specification. The client redirected savings to upgraded bathroom fixtures—a higher-impact investment for guest experience.
Case Study 3: The Phased Approach That Kept a Project Alive
A nonprofit client had champagne taste and a beer budget. Their facility desperately needed renovation, but fundraising had stalled at 60% of goal.
Rather than scale back the entire project, we proposed phasing. Phase one would complete core infrastructure and public-facing spaces—the areas donors would see. Phase two would address back-of-house and administrative areas when additional funding arrived.
Within Phase One, we applied rigorous value engineering. Standard materials in private offices. Premium materials in program spaces. Durable-but-economical finishes in high-traffic circulation. Investment concentrated where mission delivery happened.
The phased project succeeded. Phase One came in under the available budget. The completed spaces energized donors, and Phase Two funding followed within 18 months.
Building Budget Intelligence Into Your Practice
Budget-smart design isn’t a project-by-project activity. It’s a firm capability that improves over time.
Creating a Cost Database for Your Firm
Every project generates cost data. Most firms let that data disappear into filing cabinets. Smart firms capture it systematically.
Build a simple database tracking installed costs for common materials and assemblies. Update it with every project. Over time, you’ll develop benchmarks that make early-stage budgeting far more accurate.
Include notes on project conditions that affected costs. Urban versus suburban locations. Union versus open shop labor. New construction versus renovation. These variables matter, and your database should capture them.
Contractor Relationships That Improve Estimates
Contractors have the most current cost information. Their relationships with subcontractors and suppliers reveal real market pricing that published data can’t match.
Cultivate relationships with contractors who will provide informal pricing feedback during design. These “budget check” conversations—before formal bidding—identify problems early when solutions are cheap.
Some firms formalize this through construction manager partnerships or contractor consulting agreements. Others maintain informal networks. Either approach works; what matters is having access to real cost data during design phases.
Post-Project Cost Audits for Continuous Learning
After every project, conduct a brief cost audit. Compare estimated costs to actual costs. Identify where estimates were accurate, where they missed, and why.
Look for patterns. Are certain material categories consistently underestimated? Are installation costs for specific assemblies higher than expected? Do certain project types carry hidden costs?
Feed audit findings back into your cost database and your design standards. Continuous improvement requires continuous feedback.
FAQs: Budget-Smart Material Selection
How do I convince clients that spending more upfront saves money long-term? Present lifecycle cost analysis with clear assumptions and cost-per-year calculations. Quantify maintenance savings and replacement costs. Use case studies from similar projects. Most clients respond to math when it’s presented clearly and honestly.
What percentage of a commercial interior budget typically goes to materials? 70% for Materials and Furnishings: This includes furniture, lighting, flooring, paint, and accessories. 30% for Design Fees: This covers the designer’s time, expertise, and coordination efforts. However, this varies significantly by project type and scope.
When should value engineering happen in the project timeline? Start during schematic design and continue through design development. By construction documents, major opportunities are gone. Statistics indicate that value engineering can facilitate efficient cost management, resulting in savings of up to 20% in construction projects. But those savings require early engagement.
How do I specify TFL without clients thinking I’m cutting corners? Educate clients about material hierarchy. Explain where TFL excels (vertical surfaces, cabinet interiors) and where HPL makes sense (high-impact horizontal surfaces). Show them that major hospitality and corporate projects use TFL strategically. The savings enable investment elsewhere.
What’s the single biggest budget mistake you see designers make? Treating all areas equally. Not every square foot deserves the same investment. Identify hero zones and support zones, then allocate budget accordingly. Premium materials everywhere exhausts budgets. Premium materials where they matter creates impact within constraints.
Conclusion: Value Is the Goal, Budget Is the Constraint
Budget-smart design isn’t about spending less. It’s about creating more value with available resources. Every project has constraints. The designer’s job is to maximize outcomes within those constraints—not to pretend constraints don’t exist.
This requires shifting from product thinking to function thinking. What does each material need to accomplish? What’s the most efficient way to accomplish it? Where does investment create returns? Where does investment disappear into diminishing returns?
It requires honest conversations with clients. About what their budget can realistically achieve. About tradeoffs between first cost and lifecycle cost. About where to invest and where to economize.
And it requires building firm capabilities over time. Cost databases. Contractor relationships. Post-project audits. The firms that get better at budget-smart design don’t just save clients money—they win more projects, deliver better outcomes, and build stronger reputations.
Start this week. Pull a current project and map materials into “hero” and “support” categories. Run a quick lifecycle cost comparison on your flooring specification. Ask a contractor for informal pricing on a casework assembly.
Budget intelligence isn’t magic. It’s practice. The more you practice, the smarter your material selections become.